Honda CBR 600RR Forum banner

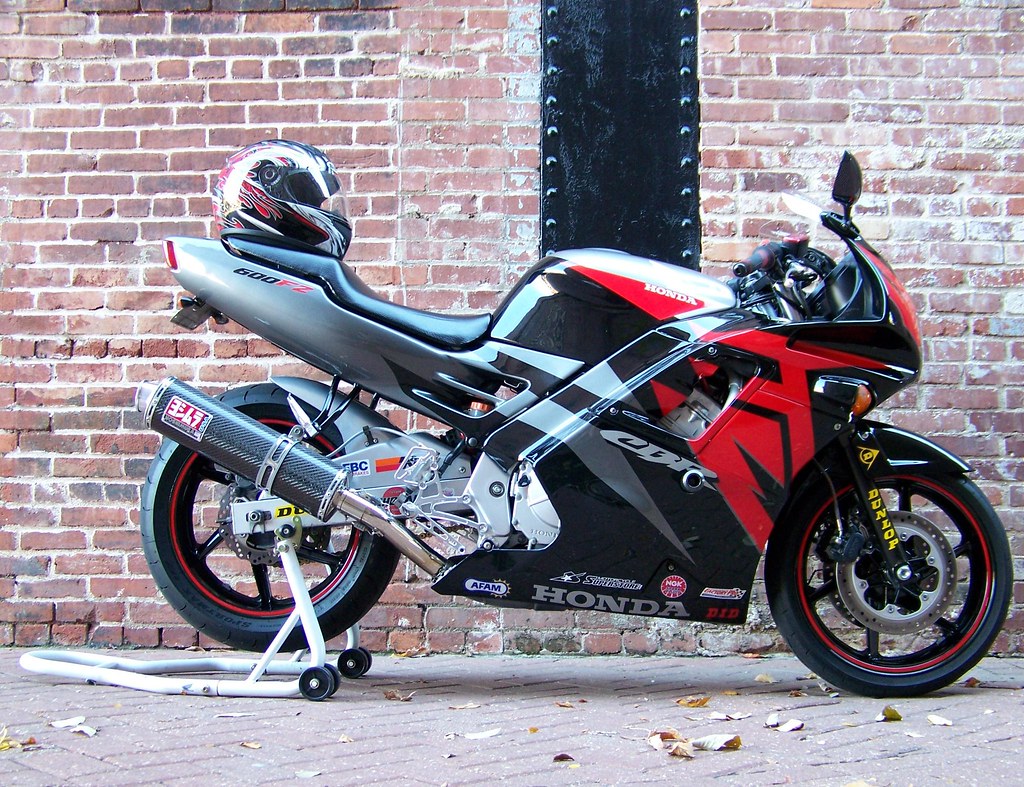
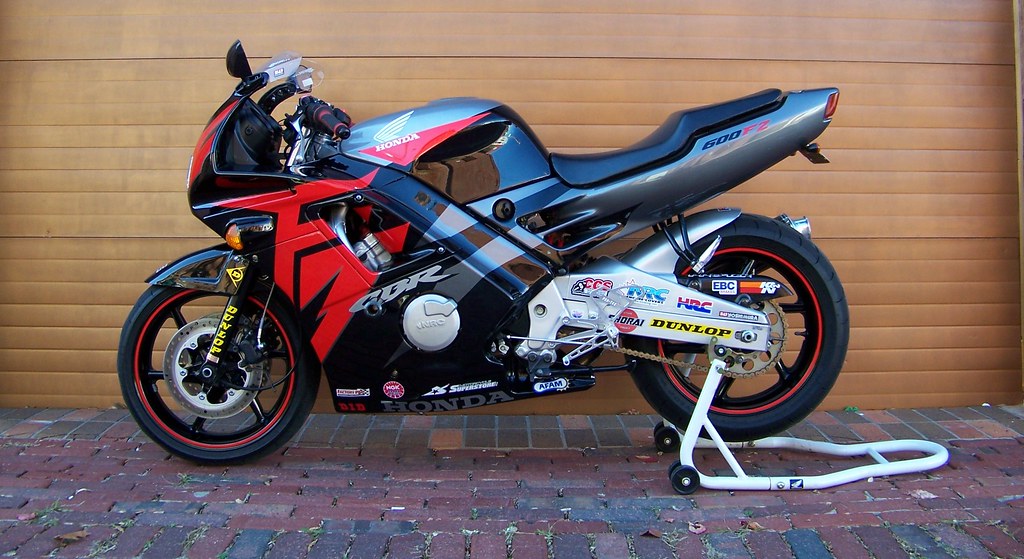
CBR 600 F2 Race Bike

82K views 219 replies 28 participants last post by  JNSRacing  
#1 · (Edited)
I haven't been a member here very long, but have been enjoying checking out some build threads, and have noted a lot of familiar usernames.

For some on here, you may have already seen some of the work, on another forum, but I figured I would post up my progress here, for those who haven't seen it, and enjoy checking out builds!

No, it's not an RR, but it is a CBR 600... here goes...


I got the bike 5 years ago - it was an immaculate low mileage example, and the price was plenty reasonable.

The original owner was a fellow in his mid to late 40's, who had just gotten divorced, and I think made this bike one of his "I've always wanted to do this, but the old lady wouldn't let me" purchases, that, and/or maybe he was trying to attract some girlies... anyway, he was the type that didn't ride it hard, and actually, didn't ride it much, really.
It was always garaged, well cared for, and eventually forgotten, as it sat in the garage for a very long time.

My boss at that time, picked it up from him, and had it for about a year, before selling it to me - this guy was a very cautious type of guy, who also didn't ride hard, though a little more frequently than the first owner. I highly doubt he ever took the thing above 75 or 80... as a matter of fact, I'm almost certain of it, as he never addressed the issue of a carbureted bike sitting for so long, so it could barely get past 80mph anyway!!

So, here it was as I received it, 16 years old and with just over 4,000 miles - the bike was completely bone stock, including tires and chain/sprockets, and brake pads.

Image


It was pretty much pristine, there was one or two spots where my boss, the previous owner, had put the tiniest mark on it, but you had to be looking for those flaws, to find them.

The current rubber was old, hard, worn, and seriously lacking rain sipes, so I put some Q2s on it.

Image


Image


Image


I was very proud to have such an immaculate stock bike, and in my opinion, this paint/graphics scheme was the least "dated" look the F2 had.
I had no plans of ever racing this bike, as a matter of fact, I had no thoughts of even taking it to a track day, as I was focusing on an '09 R1 project for A Superbike and A Superstock racing - I was happy to leave the thing mostly alone, with the exception of getting the carbs cleaned, so it would run as it should, but alas, several circumstances changed all that.

For starters, I was laid off from a great paying job, during the ongoing U.S. economy issues, and the R1 project had to go, so I ended up with this F2 being my only bike. It took a long time to get decent work again, and that was at a considerable loss of salary, then, to add insult to injury, I got ran off the rode by a negligent driver, and this gorgeous stock bike was no longer so gorgeous.
Don't get me wrong, it wasn't smashed to bits or anything, but there was considerable fairing damage, and damage to the stator cover, bars, levers, mirrors, exhaust, and the OEM fender/signal apparatus... bottom line is, as most of you know restoring OEM plastics, repainting, and replacing the original graphics, can cost as much as or more as what the bike is worth.

I was sad, very sad, but I got over it, my injuries healed, and since I no longer had a beautiful stock bike to keep mint, it was time to go to town on it!!

I got a fairing kit, replacement stator cover, and Yosh RS-3 carbon fiber can on the way.

I got it stripped down, and installed the Yosh pipe and stator cover - I went with an NRC, as now I did figure I would get it to the track eventually, as the R1 project was no longer.

Image


Image


While I was at it, I cut and removed the rearmost portion of the passenger peg brackets, where the reflector mounts are, and the tabs for a cargo strap.

Image


Image


I filled in the brackets where the cuts took place, and painted them black - they did not look perfect, but at that point I had no intention of leaving them on for too long anyway.

Image


Image
 
#2 · (Edited)
I had also ordered a fender eliminator kit for the bike, so I removed the OEM fender/tag mount/turn signal apparatus, and got the Competition Werkes unit installed.

Image

Image

The fairings arrived, along with a Zero gravity windscreen, frame sliders, red rim tape, billet passenger pegs, new mirrors, and Russell stainless steel front brake lines.

To install frame sliders on an F2, you've got to cut the fairings, so I wanted to be certain my cuts were precise.
I used one of the mounting bolts, and attached a thumb-tack to the end, to help me get a mark for the pilot bit on the hole cutter - I mounted the side fairings, heated the tack point with a lighter, and then pushed the bolts through in reverse, from inside to out, so the heated tip would leave an indention on the inside of the fairings - this gave me a perfect mark for the pilot bit.

Image

I drilled a small hole through from the inside of the fairings, at the mark, but used the hole cutter from the outside to in, to limit flaking of the finished surface.

Image

Mounted the sliders.

Image

Image

I used automotive interior trim fasteners to button up the front inner cowling at the bottom.

Image

Removed the front reflectors, and mounted the Russell lines.

Image

So here's how it looked at that stage - I used the tank cover that came with the kit, with the plan to paint the tank later.

Image

Image
 
#3 ·
Just for the sake of aesthetics, I put a Pro-Tek front reservoir cap on.

Image

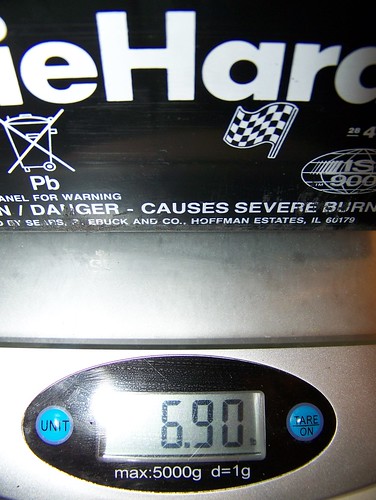
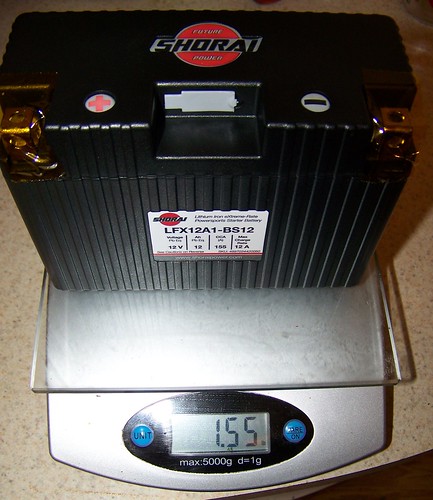
For some weight savings, I replaced the heavy wet battery with a very light Shorai dry-cell, which was a little over 5 1/4 lb. lighter.

Image

Image

For weight savings, better looks, and most importantly, improved ground clearance at lean, I got some Pro-Tek rearsets, which moved things up and back 1".

Image

Image

This was a big improvement, going from this look:

Image

...to this:

Image

Image

I installed a braided stainless brake line on the rear, and here's a closer look at the billet passenger pegs, which required some grinding, in order to be mounted.

Image

Image
 
#9 ·
Heeeeeey! I know you. Good to see your bike on this side. We welcome all brands here. And I love your bike!
Hey trevRR! Yeah, and your bike is quite distinctive, I noticed it in your signature on one of the build threads I was checking out!

That's awesome and awesome work. The bike looks good.
Thanks... It's far from over - I'm trying to catch things up to current time!

Beautiful build! Truthfully I love the 90's "dated" color schemes. Lol. Bike looks great.
Yeah, I do like some of the older schemes, but not all, and if the bike is in poor condition, it just doesn't work... I'm quite upset that it's no longer the perfect, fully stock example it was, but, that ship has sailed, so I had to move on, and make it something else.

Nice build, nice bike; I cut my teeth in those old CBR's. They may not be much of a powerhouse compared to the modern stuff but pull and handle quite nicely.

Sweet!!!!

Mike
Thanks Mike! You know, I cut my teeth on bikes even older than this, but I was a Yamaha man back then - I had some Hondas too, but never a CBR from the "F" days - I was on Yamaha 750's and 1000's (FZRs).
This was a legendary period for the F bikes, though, dominating AMA supersport competition for nearly the entire span of the F2 and F3 eras.

i couldnt ever understand why these bikes looked good to anyone, until i saw this one! definitely pristine and nicely done
I guess part of it depends on how old you are, though I do know some pretty young guys that dig the old bikes anyway. Like I said above, for me personally, I don't appreciate ALL the older models, and definitely not ALL the color schemes, and when the older bike is not in good condition, it makes the appeal even less... truthfully, there are some older sportbikes that I find downright heinous, even in perfect condition!!
 
#7 ·
Nice build, nice bike; I cut my teeth in those old CBR's. They may not be much of a powerhouse compared to the modern stuff but pull and handle quite nicely.

Sweet!!!!

Mike
 
#11 ·
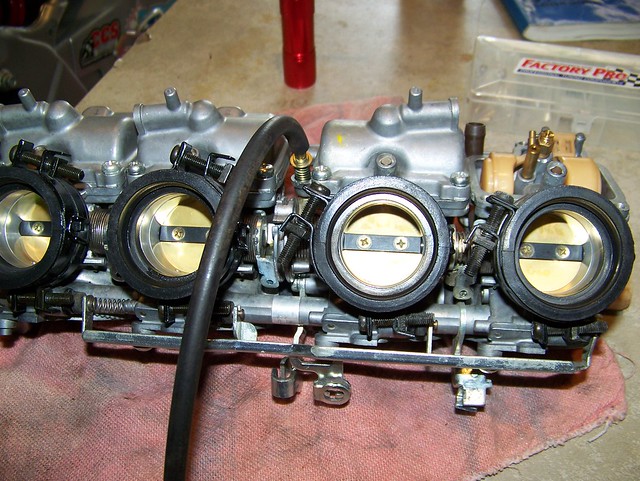
Carbs... remember those?!? Time to get them thoroughly cleaned and tuned.

Image

I installed a K&N filter, so I picked up an assortment of larger main jets, as well as some Factory Pro jet needles.

This carb bank had never been off the motor, and therefore never been separated, so I wasn't worried about a synch, and keeping it simple with feeler gauges under the butterflies, proved a synch would not be at all necessary, so I just cleaned them up, took the fuel screws out to 2 1/2, installed the Factory Pro needles, and gave it a run with 138 mains, which is one step up from the stock 135 mains.

Image

Image

The carbs weren't as dirty as I expected, and the slide diaphragms were in absolutely perfect condition.
I suspect that the original owner faithfully ran new gas through it, and started and ran the bike pretty regularly, even when it sat without riding for so long, nonetheless, even though the low-end and mid-range performance wasn't bad before, it was vastly improved now, pulling like mad from anything above 3500, and frequently trying to loft the front wheel.

The stock mains were obviously somewhat blocked, though, so I was expecting to finally hear it scream up top, with the 138's, but with the change of air filter, I knew I would still have to do some tuning.

It now reached higher top speeds than before, but had a wicked stutter in the main circuit - it was enough of a lean stutter, that I decided to skip 140's, and move on to 142 mains, after which, sha-ZAM!! It ran like a raped ape, spinning up to redline in a flash, with the front wheel skittering above the road surface in the first 4 gears.

This was getting me excited, and since I no longer had a separate race build project, "the bug" sank it's teeth in my deeply, and I began to chase more mods for weight loss/performance improvement, and wee bits of "pretty" here and there.

I'm a firm disciple of certain brands for certain parts, and for drive-train, it's AFAM for sprockets, and D.I.D. chains, I don't see this ever changing, as I simply believe they're the best out there, and their products have never let me down.
I went to 520, and put on some AFAM race sprockets - stock 15 on the front, and up to 45 in the rear - D.I.D. ERV3 chain to complete.

Image

Image

Image


I pulled the top triple clamp, stripped it, repainted it in gloss black, and applied a carbon fiber cover from Skur - my goal was to reduce the scratching up of the yoke with keys, but the cover actually marked up just as easily, and was later scrapped.

Image

Image

Somewhere along the line, I ditched the tank cover, finding that the original paint/graphics on the tank, actually didn't look so bad with the fairing set I installed, as I had first thought. I also installed some newer carbon fiber look mirrors - I honestly feel these mirrors really transformed the look of the bike, and I was very shocked that they held in place with no problem, and had no issues with vibrating at any speed.

Image

Image
 
#14 ·
Looks immaculate for its age!!!! I had an f2 as my first bike that wasn't in the best shape but it was such a nice cruising bike.

I miss the comfyness of the seat compared to my 07 rr.
The F2 is definitely a "best of both worlds" machine -comfortable for commuting, but a formidable track weapon when set up right!
 
#15 ·
No center stands on the U.S. F2s, so no more center stand mounts.

Image

Installed an EBC Pro-Lite rotor in the rear.

Image


Time to address the issue of forks sprung for 140 lb. rider, and me NOT being a 140 lb. rider!
At this point, I didn't have a lower triple clamp lift front stand, so I had to use wood block/jack under the exhaust, with straps through the frame taking some weight off, and held things steady.

Image

RaceTech .95 springs going in, with collars cut for some additional preload - also new fork seals, and Motorex 10W.

Image

Image

Image

Welded some coupling nuts to the swingarm (8mm X 1.25 pitch X 22mm), and screwed in some spools.

Image


Tried my hand at some pictures using something other than my garage for front walk for a backdrop... I am NO photographer, not by any stretch, but I think they look at least "alright".

Image

Image

Image
 
#18 ·
I installed a headlight cut-off switch, so I wouldn't have to keep unplugging the headlight when taping it up for track days.

Image

I fabricated an aluminum exhaust hanger for lighter weight, when not needing to carry a passenger.

Image

Image

Image

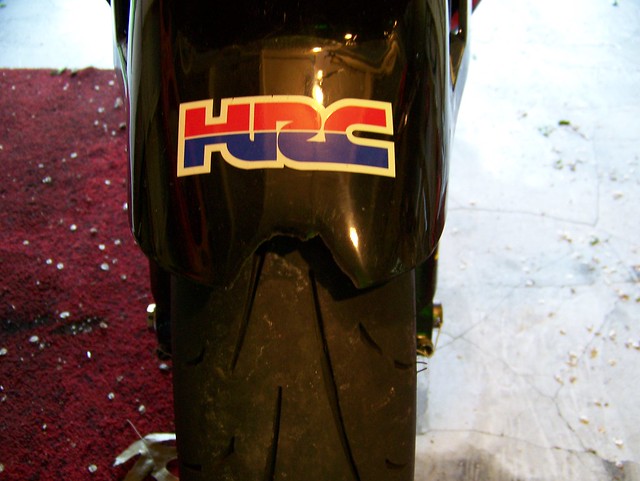
At high speeds on the track, I had some issues with the front fender - it is true that there is some expansion of the tire at speed, but the stock fender had a little more clearance, AND the aftermarket fender was a much thinner, lighter, and therefore flimsier plastic, which resulted in this:

Image

I created a template based on the radius of the stock fender, marked the aftermarket fender with an awl, cut at the mark with a Dremel, then used a small sanding drum with the Dremel, to clean up the cuts, and then used touch-up paint on the cut edge.

Image

Image

Image
This worked for a time, but I had to repeat it on several instances, until I had finally trimmed back to a place where the plastic was a little thicker, and more rigid in the wind!

New Renthal grips... at this point, these were the best I'd tried yet, and I had cycled through multiple Pro-Grip items, none of which had good feel, or lasted very long at all. These Renthals were fantastic!

Image

With track time being more frequent, I drilled some relief holes in my levers, so an off wouldn't leave me with the inability to ride it back to the pits, if the rest of the bike was functional.
For those unfamiliar with this trick of old, the picture will probably say it all, but the idea is that the lever will break off at the point of the relief hole, rather than further up, possibly rendering the lever unusable.

Image
 
#19 ·
Safety Wire

Though safety wiring is not required for most track days, it is encouraged, and is good practice for all participants, whether required or not - I was no stranger to safety wiring components, and wanted to further prepare the bike to be able to race as well, since it was looking like it was going to be a good long while before I could afford another new/big bike for an A Superbike/A Superstock build, so, I wired it up.

Image

Image

Image

Image

Image

Image

Image

Some race orgs require a hose clamp on the filter, but I wasn't certain about the one I was scoping out... easy enough to change later if necessary, and since I ordered a bunch of spring clips to make changing frequently pulled safety-wired components quicker and easier, I knew I'd be re-doing some things anyway.

Image

Image

Image
 
#22 ·
Safety Wire - Front Brake Components

Image

Image

Image

The spring clips had not yet arrived, but I found that I did have a large enough hose clamp on hand, to meet the more stringent requirements of some race organizations.

Image


Some other items arrived - EBC 310mm floating rotors, and the necessary caliper relocation brackets to employ them - this is quite the increase in size, as stock F2 rotors are only 276mm.

Image

Image


Though they may not seem like they should be, the F2 standard braking components are actually quite adequate - this upgrade was intended to reduce heat, and the potential warping of the OEM rotors that might occur during consistent heavy braking - this is accomplished due to the materials used, and of course, the full-floating design and larger diameter... that said, with this setup, the stainless lines, fresh fluid in a fully bled system, and new pads, the stopping power was indeed drastically improved!

Image

Image

Since the brackets and calipers don't ever need to be separated, I went ahead and safety wired them without spring clips, intending to use the spring clips, once they arrived, for wiring the bolts used to secure the brackets to the forks.

Image

Image

This was all about functionality, but these are mighty fine looking... form was definitely a nice by-product in this case!
 
#23 ·
Trailer

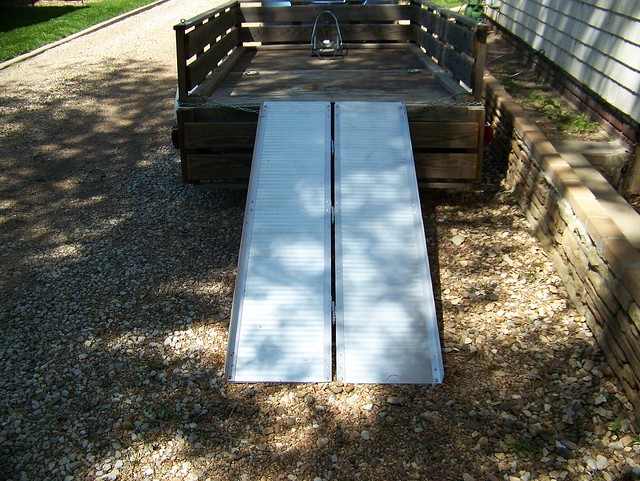
This is not very exciting, but this is the trailer that I picked up for hauling to the track - got it for $250 - it's constructed from a boat trailer, all the wood is treated, and it was put together very well.

Image

Image

I mounted a front wheel chock, and some heavy duty D-rings for securing things.

Image

Just after scoring the trailer, I found this 6' X 3' folding ramp on sale for a significantly lower price than usual... I think I paid under $100 for it, and it's a very good ramp.

Image

Both tires were good, and relatively new, but were not high-speed rated, so I pulled them to use as spares, and picked up two new wheel/tire sets... once again, I lucked out with a sale, and paid like $39 per unit.

Image

I also had to buy a spare tire mount, and a folding roller jack for the tongue, but these items were barely $50 in total.

Image

I posted this, because it's pertinent to one of my next few purchases.

I upgraded to an F3 rear wheel, which is 5 inches wide, as opposed to the 4 1/2 inch F2 wheel, then for street use, I went from 160/70 to a 170/70 Q2 rear tire.

Image

Image

Image

Image
 
#27 ·
Had to get the red stripe on the new wheel. :biggrin:
It's amazing how bland the wheel looks without one, after you've gotten used to how they look with the accent.

Image


I then upgraded to a very nice bit of hardware, for well-securing the bike in the trailer, the Pit Bull trailer restraint system - I could never go back to just a wheel chock and straps!

Mocked it up on the axle...

Image

... and got it mounted.

Image

Image

Image


I scored a "budget friendly" package from a member on another forum site, which included several goodies for the bike - this guy used to track an F2, and had upgraded to a newer machine - he made me an incredible deal on some items.
This Two Brothers header was one of the items.

Image

Other items included some old Cheetah race plastics, a quick-throttle tube, an extra sprocket carrier with a Driven 45 tooth sprocket mounted, which had lots of life left, and the Fox Twin Clicker race shock pictured below.

Image


In my weight saving craze, I trimmed some of the unnecessary metal from the base pan of the fender eliminator kit.

Image

Image

I later used my Dremel with a sanding drum, to smooth out the cut edges.
 
#28 ·
With the OEM rearsets and plastics, running a GP shift setup was no problem, but with the aftermarket plastic and Pro-Tek rearsets, I had clearance issues in two different places.

Firstly, the shift rod wound bind up just a little on the sidestand bolts, and though this was no issue at the track, because I removed the sidestand, the bike was still needed for street duty, so I needed it back on after each track day. I wasn't interested in going back and forth from standard to GP shift, either... I prefer to run GP shift for street and track both.
Secondly, the inverted shift knuckle fouled on the fairings.

I got some different bolts for mounting the sidestand, which had a lower profile head, but I still had to grind some more off - then I used my Dremel to cut the fairings enough to allow clearance, and used some touch up paint to cover the cut edge, like I did with the fender trimming... even looking closely, you can't really tell where I modified the fairings.

Image

Here it sits at Heartland Park, with mirror block-offs, and lights/signals taped up for a track day.

Image

I ran the wonderful combination of a Michelin Power One Race rear, in medium compound, with a Power Cup "V" race front, also in medium compound. These are the treaded race tires, not the street tires, and they were FANTASTIC!!! I stuck to the track like glue!
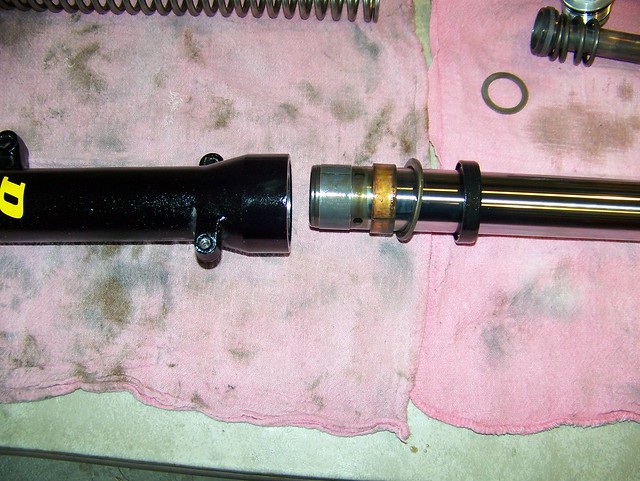
This was a great experience, as here I was running with a completely different shock, with factory recommended baseline settings, new springs and heavier oil in the forks, and different tires - so the forks, shock, and tires were ALL different than they were for my last track outing -so for it to all come together perfectly, without need to fiddle with any settings, was quite miraculous in my book! The setup was perfect all day, I just set tire pressures and got to it. :thumbup:

I flogged that thing hard all day, in 105Âş temps (not sure what the track temp. was), and it was on rails through all 7 sessions that day - what's more, is that they still had lots of life left... I don't remember how much use I got out of the sets, but I kept getting them as long as I could, as sadly, the Power One rear that I needed (160/60) was being discontinued.

Image

Image


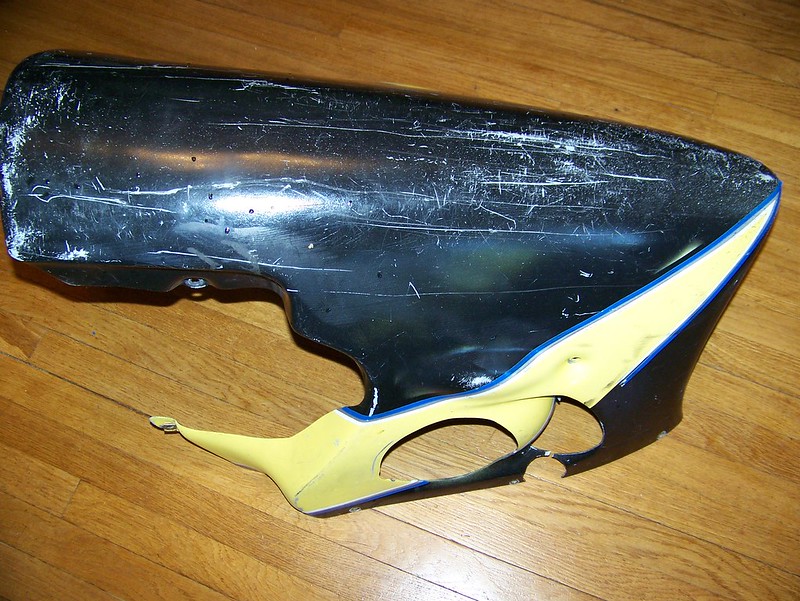
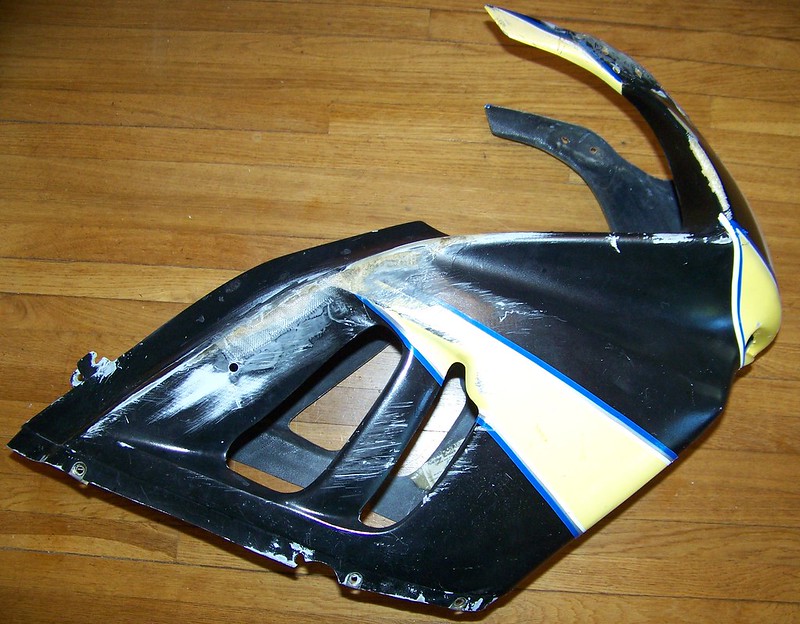
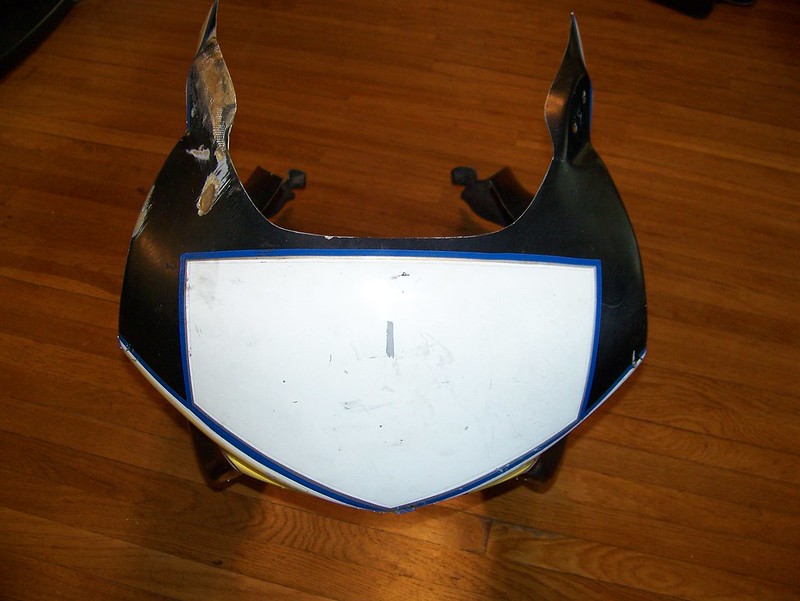
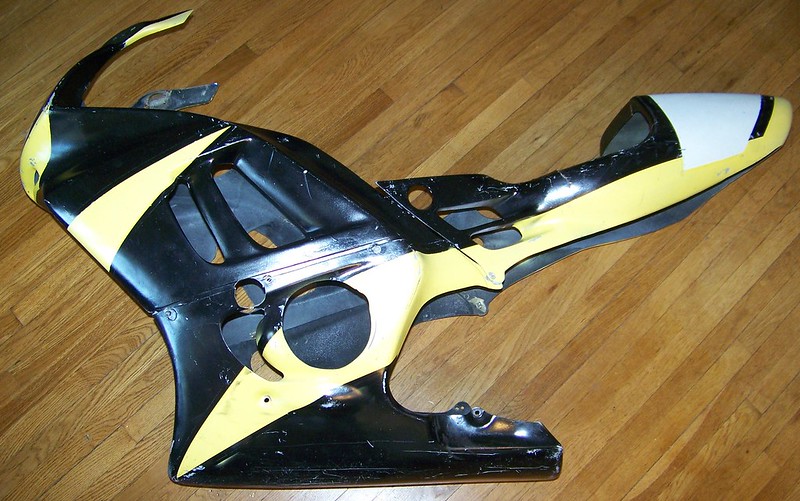
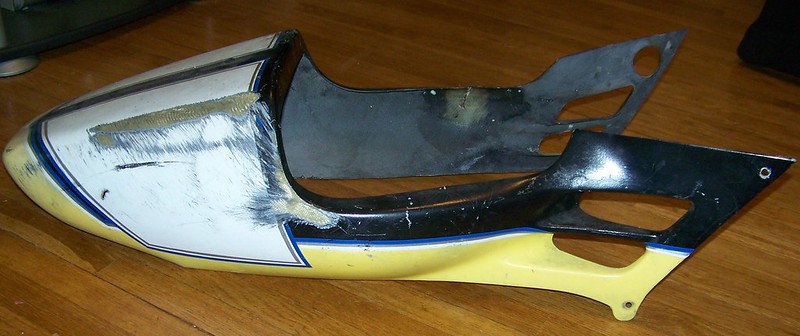
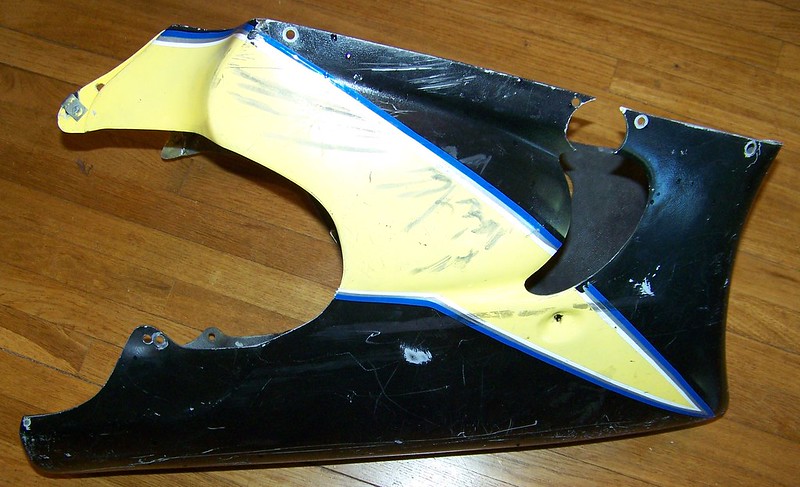
So then it was time to start working on the race bodywork - the rashed and worn-thin Cheetah stuff that I had acquired.
Here's how it looked at the start.

Image

Image

Image

Image

Image

I had my work cut out for me, but since I had never done any fiberglass repair, since aiding my father in repairing one of his hard panniers on his CB750, when I was 10 or 11, and the only paint/body experience I had was some sanding, Bondo work, priming, and masking, in my High school auto mechanics class, I was really looking forward to this as a challenge.
 
#29 · (Edited)
I removed all the pin-striping from the race glass, and got it cleaned up, so I could then decide on how to paint it.

Image

I decided that I would incorporate some of the existing style into my finished product, and then proceeded to prep the pieces for priming/painting.
I used fiberglass to repair the many cracks, holes, and spots where the glass had been worn quite thin, from repeated rashing, reinforcing these areas with a good size piece of glass from the back side.

Though this plastic allegedly came off of an F2, it either had an F3 fairing stay, or an aftermarket race stay, because almost none of the holes lined up anywhere, so they had to be filled and re-drilled in the right places.

After all the repairs had been made, I began to sand, and applied copious amounts of spot and glazing putty, in an effort to get the surface ready.
Image

As you can see in these pics, I also trimmed "the ears", that extend past the windscreen mounting, which were excessively long to begin with.
I got things primed, and used bonded sealing washers for "soft" mounting points, so the finish would not be constantly scratched up by the heads of the screws or regular washers.

Image

Image

So for track use, I obviously had no use for signals, tail light, and license plate, but I decided this time, to further lighten things up, by not just removing the signals, plate, and tail lamp assembly from the base pan of the fender eliminator kit, but by removing the base pan altogether, and coming up with a different way to support the rear of the race tail.
I pulled the pan, which is actually quite heavy.

Image

I then used one of my early attempts at my lightweight exhaust hanger, cutting it down to fashion a tail mount with it, and some allthread, coupling nuts, and lock nuts.

Image

I got my base coats of black on.

Image

Image

Unfortunately, I didn't have time to add other colors and clear-coat, before taking it to the track again.
I didn't mind it being all black, so much, but was concerned about them getting marked up at all, before I was able to finish them.

Image

Image
 
#32 ·
That bike looks cleaner than my 05 RR did.
lol... nice build man, really enjoying it!
Thanks! Likewise on your GSX-R build.

Digging the Dunlop stickers! ;)
Yeah, these are required for my Dunlop sponsorship contingency, so I eventually return to Dunlops, for racing. This is fine, because Dunlops are my preference anyway... I was just playing with the Michelins at some track days!
 
#33 ·
I really like your thread, my first bike was a cbr f3, and it was the first bike to take on track too. So sweet memories for me!
Thanks droom! For sure, the F2s and F3s were (are) legendary - comfortable on the street, but still competitive on track, when set up right, and with a good rider mounted.

You're doing a great job with this bike. It will give you plenty of satisfaction.
Oh indeed, it has already! I'm just catching things up to current time... though I got it with a bit over 4,000 miles, it now has about 27,000, several thousand of which were turned on the racetrack.
 
#34 · (Edited)
I got the glass back off, after some track time, and honestly, I don't remember if I had to shoot on some more black, or if I just did some touching up, but at any rate it was time for color.
I put them back on the bike, and masked them up for some red accents - I used Cherry Red, in the same paint line the black came from, and in retrospect, I wish I had discovered the Banner Red, which is in the same line, and was a little brighter. But, the place I was first buying the paint from, had a limited selection, and I did not realize just how many colors were out there. :sad3: :dontknow:

Anyway, live and learn... here's the red accents.

Image

I put the tank cover back on, that came with that aftermarket street fairing kit, since I was going to paint the tank black at some point, and I wanted to see what the overall look was going to be.

Image

Image

I masked off the tail for the number plates...

Image

Image

...and got them painted on.

Image

Image

Image