

Having a look around on the net and around dot net I found a bunch of DIY FEs and what not but didn't think much of them (no offence) and the ones that I found to buy were way to expensive for my liking. So I figured I would do my own. Unfortunately I was about three quarters of the way through when I decided I would do a DIY for it, so there are not many photos of the start.
First thing is to print off the attached pictures / word document (in the zip file) they are just a template that I made up. You will see two lines one each that are 5cm long, these are there so that you can get them scaled correctly for printing.
The template has some black lines and red ones, the black lines show where you will have to cut and the red ones where you will have to fold the steel. Its also done in two halves so that I could print it off with my A4 printer, you just need to cut it out and stick it together in the middle along the green line.
Next stick the template down onto a 1.5mm piece of steel sheet metal and centre punch the points where all the lines meet and a bunch of points around the curved bits. You should have something that looks like this:
![Image]()
Now when you have removed the paper you will see a bunch of marks, and the next step is to play connect the dots with a scribe until you have the template redrawn onto the steel.
Once you have done that you will need to cut it out. I used a jigsaw to cut out most of it and then a grinder to do the curved bits. After cutting it you will need to drill the mounting holes out with a 15/32 inch bit.
After all that you are ready to start folding the steel, just do it so it looks like this:
![Image]()
![Image]()
![Image]()
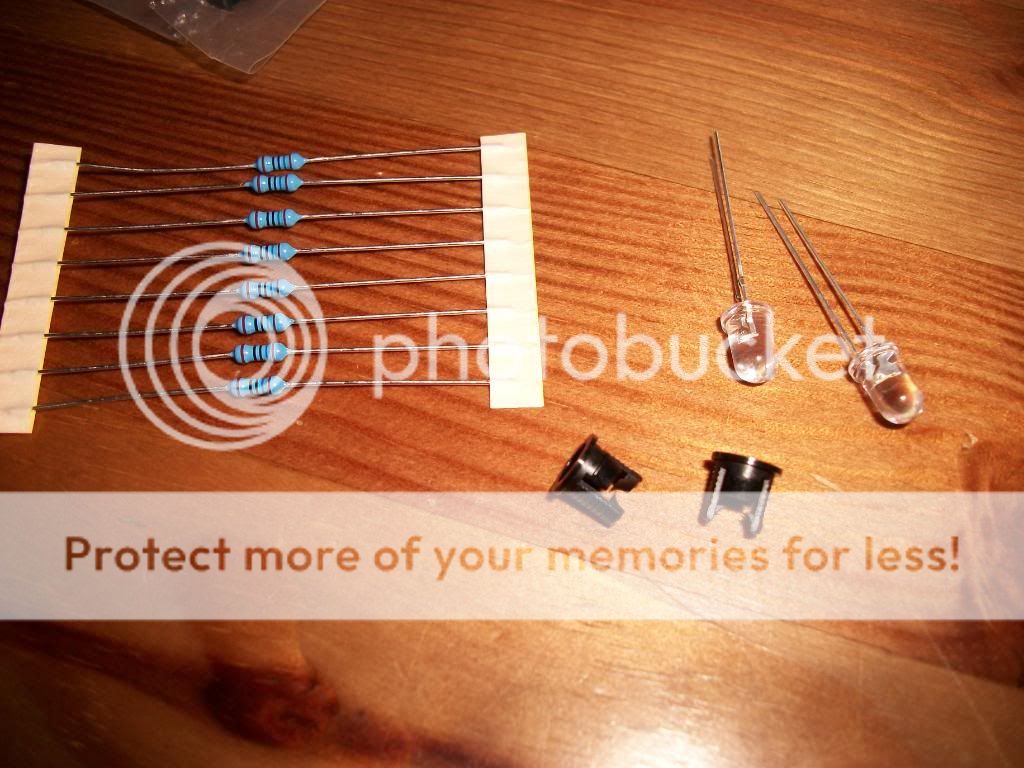
I have cut out a piece of steel 180mm long by 25mm deep to mount the number plate on, obviously you may have a different size number plate and have to adjust this to suit so I didn’t include it on the template. To attach it I drilled two quarter inch holes through the small bent down piece and then lined her up and put a big tack weld on top of each hole to stick the two pieces together. I did it this way because I don’t have a spot welder and when I tried doing a fillet weld along a couple of scrap pieces I just blew holes everywhere. Next step is to drill some holes to put your indicators into and two small holes to put some LEDs to light the number plate with.
When you go and pull the old fender off you will see a couple of aluminium pieces that bolt onto the sub frame, the bolts go through rubber grommets that you will have to keep to use on the fender eliminator. Just pop them into the mounting holes you drilled earlier and once you have drilled out some holes to put your indicators into you will be ready to bolt it all up for a test fit, should look something like this:
![Image]()
![Image]()
Then give it a sand or a quick go with a sand blaster to get all the scale off the steel. I am sending mine off to be powder coated but you may just wish to give it a spray with a pressure pack. Once its finished I will post up a pic of how its turned out.
First thing is to print off the attached pictures / word document (in the zip file) they are just a template that I made up. You will see two lines one each that are 5cm long, these are there so that you can get them scaled correctly for printing.
The template has some black lines and red ones, the black lines show where you will have to cut and the red ones where you will have to fold the steel. Its also done in two halves so that I could print it off with my A4 printer, you just need to cut it out and stick it together in the middle along the green line.
Next stick the template down onto a 1.5mm piece of steel sheet metal and centre punch the points where all the lines meet and a bunch of points around the curved bits. You should have something that looks like this:

Now when you have removed the paper you will see a bunch of marks, and the next step is to play connect the dots with a scribe until you have the template redrawn onto the steel.
Once you have done that you will need to cut it out. I used a jigsaw to cut out most of it and then a grinder to do the curved bits. After cutting it you will need to drill the mounting holes out with a 15/32 inch bit.
After all that you are ready to start folding the steel, just do it so it looks like this:


I have cut out a piece of steel 180mm long by 25mm deep to mount the number plate on, obviously you may have a different size number plate and have to adjust this to suit so I didn’t include it on the template. To attach it I drilled two quarter inch holes through the small bent down piece and then lined her up and put a big tack weld on top of each hole to stick the two pieces together. I did it this way because I don’t have a spot welder and when I tried doing a fillet weld along a couple of scrap pieces I just blew holes everywhere. Next step is to drill some holes to put your indicators into and two small holes to put some LEDs to light the number plate with.
When you go and pull the old fender off you will see a couple of aluminium pieces that bolt onto the sub frame, the bolts go through rubber grommets that you will have to keep to use on the fender eliminator. Just pop them into the mounting holes you drilled earlier and once you have drilled out some holes to put your indicators into you will be ready to bolt it all up for a test fit, should look something like this:


Then give it a sand or a quick go with a sand blaster to get all the scale off the steel. I am sending mine off to be powder coated but you may just wish to give it a spray with a pressure pack. Once its finished I will post up a pic of how its turned out.


")


